Quantcast
Channel: ArborXR
Viewing all articles
Browse latest Browse all 117

Developer’s Journal: ArborXR Home – Unity GitLab Build Pipeline

$
0
0

Developer’s Journal: ArborXR Home – Unity GitLab Build Pipeline

Written by Darren Delorme, Unity XR Developer @ ArborXR

Introduction

Whether you are developing a virtual reality experience for enterprise, a consumer game, or an augmented reality enterprise application, there is something in this series to help you with your endeavor.

In this blog series, we’ll explore the process, motivations, and techniques behind building a Unity GitLab Build Pipeline, a Multi-Platform XR Input System, VR UI Design, and a 3D Home Environment. Join me as we dive into the process of transforming our ArborXR Home app into a modern and unique XR experience, achieved through the collaborative efforts of our talented team.

This blog series is aimed at aspiring and experienced VR, AR, XR, MR, and Spatial Reality developers. I assume you already have a basic understanding of the Unity 3D engine and related XR development packages and components as we delve into technical details and insights. Additionally, be prepared for troubleshooting sections throughout the series. While I can’t cover every issue and working environment, I’ve compiled information that is often fragmented across forums, less detailed blogs, and videos to help you overcome challenges on your XR development journey.

Why use a build pipeline for Unity XR?

The answer lies in efficiency, scalability, and sanity. The demand for cross-platform compatibility is paramount for XR development, particularly for VR enterprise solutions. At ArborXR, we recognized that having an automated CI/CD pipeline to handle staging and production builds for multiple VR enterprise headsets isn’t just necessary—it’s crucial to our development process.

Imagine the alternative: Without a robust pipeline, we’d find ourselves juggling multiple Unity projects tailored for various devices like the Meta Quest, Pico, HTC Vive, Lenovo, and DPVR. Building and uploading APKs for each platform would be a Herculean task. It’s a process rife with opportunities for errors, inconsistencies, and an overwhelming amount of repetitive work.

Moreover, in a team setting, this manual approach quickly becomes untenable. Collaboration and coordination become needlessly complex, as team members must meticulously ensure their changes are compatible with each platform. The potential for versioning issues, compatibility problems, and wasted time skyrockets.

This is precisely why an automated build pipeline is not just a luxury but a strategic necessity. It streamlines the entire development cycle, from code changes to testing and deployment. It ensures that each VR headset platform receives the necessary build with minimal effort and zero room for human error.

What We Will Cover
    Add a header to begin generating the table of contents

    Section 1 – Setting up a Multi-platform Unity Project

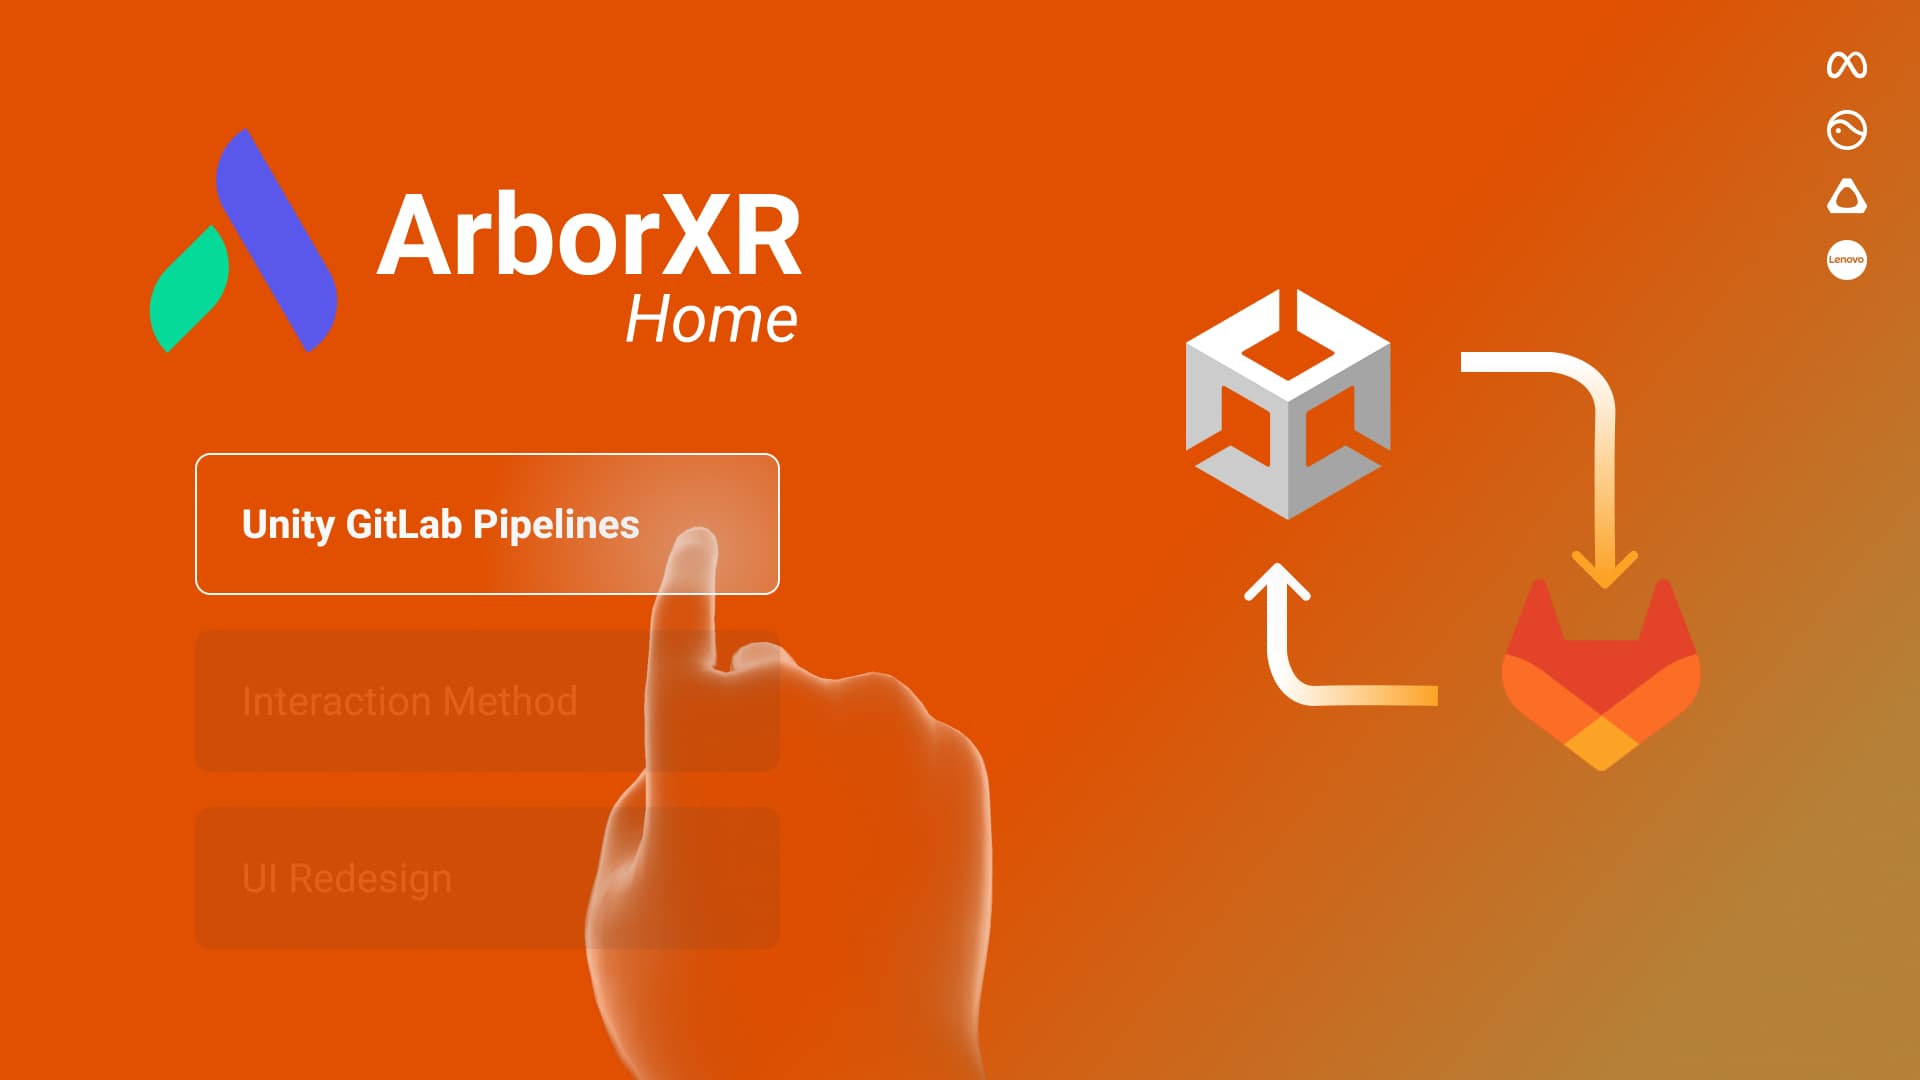
    What Version of Unity to Use?

    When it comes to Unity, they release a new version every two weeks. Finding a version that can pass all the builds, provide all the packages, and have the developer tools bug-free required is always a time-consuming task.

    After testing about eight versions of Unity for local builds that support:

    • Pico G24K, Pico Neo 2, Pico Neo 3, Pico 4 and Pico 4 Enterprise, Quest 1, Quest 2, Quest Pro, Vive Focus Plus Vive Focus 3, and Lenovo’s VRX
    • Support for Developer Build with Script Debugging

    I found that Unity 2021.3.27f LTS was the winner.

    Download and install the version from the link above using the Unity Hub and install Visual Studio if you don’t already have it installed. Select Android Build Support and install the sub-modules.

    GitLab Repo

    If you want to skip the project setup process or just follow along, you can download the project with all the necessary files and start from the next section.
    https://gitlab.com/darrendelorme/arborxr-unity-gitlab

    Create a New Project

    Create a “New Project” for the sake of this blog. I called it ArborXR-Demo, but you can call it whatever you want.

    Downloading and Importing Device SDKs

    ArborXR Home has to support a lot of devices. There are limited versions of SDKs you can use to support older devices such as Quest 1, Oculus for Business, Pico G24K, Pico Neo 2 and Vive Focus Plus, as well as their newer predecessors. We don’t recommend you start by supporting all these older devices since they are no longer supported in the most recent SDK releases. But if you want to, I’ve listed the SDK versions you will need to install to Unity.

    These are the last versions that support legacy devices.

    Devices SDK Version
    Quest for Business Download - Version 39.0
    Quest 1 Download - Version 50.0
    PICO G24K, PICO Neo 2 Download - Version 1.2.4

    These are the version to date that work with the current VR devices.

    Devices SDK Version
    Quest 2, Quest Pro Download - Version 54.1 or higher
    PICO Neo 3, PICO 4 Enterprise Download - Version 2.2.0
    VIVE Add NPM registry to the Scoped Registries Under Project Settings → Package Manager → Scoped Registries (see instruction below)
    Lenovo VRX
    SnapDragon SDK
    Download - Version 0.15.0 or greater

    Installing the Quest Packages and SDK

    Installing the Oculus Integration Package

    Installing the Quest Packages and SDK

    Installing the Oculus Integration Package
    For the Quest devices, you will need to download the Integration SDK from the link provided in the tables above and install it in the Assets folder. The easiest way to install it is to drag and drop the .unitypackage into the project Assets folder. A window will pop up, and you can select Import. Once imported, you will see a new Oculus folder under the Assets folder.

    Installing the Unity Oculus Package

    Installing the Unity Oculus Package
    Go to the package manager and ensure you have Unity Registry selected from the Packages dropdown. Now search for Oculus and Install the latest version that is recommended for your Unity Editor version.

    Installing the PICO SDK

    Unfortunately, Pico isn’t as smooth as Quest and Vive when it comes to installing their package and saving it to a Git repository. Luckily for you, we will show you how to make it work.

    Download the SDK from the link provided in the tables above. Open your file explorer and go to the root folder of your project.

    Create a new folder called NonUPMPackages and unzip the Pico SDK to that folder.

    Now go to the Package Manager, click the + icon, and select Add package from disk…

    Browse to the NonUPMPackages folder and select the package.json file to import the Pico SDK. Once installed, you will see it listed under In Project under the Packages dropdown.

    Installing the Vive Wave SDK

    Go to Project Settings → Package Manager → Scoped Registries and add the following:

    Name: VIVE
    URL: https://npm-registry.vive.com
    Scope(S): com.htc.upm
    Click Save to apply the registry.

    Now go back to the package manager and select My Registries from the Packages Dropdown. You should now see the HTC Corporation and the Vive Wave XR Plugins we need.

    Select and install the following Plugins. If the version is higher, then install those.

    • Vive Input Utility Version 1.18.0
    • Vive Wave XR Plugin Version 5.3.1-r2
    • Vive Wave XR Plugin Essence Version 5.3.1-r2
    • Vive Wave XR Plugin Native Version 5.3.1-r2 (edited)

    Setting up Scripting Defined Symbols and Scene Setup

    Now that we are done with downloading, importing and installing the device SDKs, we can need to create a way to call only the specific methods and settings required for each device.
    For this section, we will create a simple C# script to demonstrate how to set up and use custom-defined symbols, also known as preprocessor directives, to enable and disable sections of code that can be used to provide functionality for each device type.

    1. Create a new folder under the Assets folder called “Scripts”
    2. Right-click in the Scripts folder and select Create New -> C# Script
    3. Call it “DeviceManager”
    4. Double-click it, and it will open in Visual Studio

    For the DeviceManager script, we will keep it very simple. Copy and paste the code below.
    It consists of a public TextMeshProUGUI. This will allow you to add a TextMeshPro component to this script and change the UI text in the scene to show you what device is enabled and active.

    When you copy the script in Visual Studio, you will see all of the #if definitions ActiveBuildDevice.text are greyed out. We will work on enabling them in the next steps.

    using TMPro;
    using UnityEngine;
    
    public class DeviceManager : MonoBehaviour
    {
        public TextMeshProUGUI ActiveBuildDevice;
    
        //Hide all Cubes on start and show only the cube with the active define symbol
        void Start()
        {
            SetText();
        }
    
        private void SetText()
        {
    #if BUILD_OCULUS
            ActiveBuildDevice.text = "Oculus Is Enabled!";
    #elif BUILD_PICO
            ActiveBuildDevice.text = "Pico Is Enabled!";
    #elif BUILD_VIVE
            ActiveBuildDevice.text = "Vive Is Enabled!";
    #endif
    
        }
    }

    Now return to Unity:

    1. Create a new empty GameObject in the Hierarchy. Call it DeviceManager.
    2. Add the script we created earlier to the new DeviceManager GameObject.
    3. Create a Canvas, set the render mode to world space and change the Rect Transform to match these values.
    4. Create a UI Panel under the Canvas and set the Source Image to None and the alpha of the Color to 255.
    5. Create a UI Text-TextMeshPro UI GameObject under the Panel. A window will pop up to import Text Mesh Pro. Click the button to import it.
    6. Select the Text(TMP) GameObject and set the Rext Transform and TextMeshPro(UI) Component to these values
    7. Select the DeviceManager and assign the Text(TMP) GameObject to the Active Build Device property.
    8. One last step. Select the Main Camera and set the Clear Flags to Solid Color. Make the Background Color White and add a Tracked Pose Driver Component to the Main Camera GameObject.

    Great, most of the project is set up. In the next section, we will work on enabling Oculus’s project settings and the BUILD_OCULUS definition symbol.

    Testing Project Settings and Definition Symbols

    If you made it this far, congratulations, we are almost done with Unity!

    In this section, we must enable the Oculus XR runtime, set the definition symbol to enable Oculus in our DeviceManager script, create device-specific AndroidManifest files and create a build script for the pipeline.

    To enable the Oculus XR Runtime, go to Project Settings → XR Plug-in Management, click the Android tab and select Oculus.

    Now go to Project Settings → Player → Other Settings to enable and add the following:

    • Unclick Auto Graphics API and remove Vulkan from the list so the only Graphics API is OpenGLES3
    • Unclick Multithreaded Rendinger*
    • Set the Minimum API Level to Android 29. This could be as low as 26 for legacy devices.
    • Set the Scripting Backend to ILCPP
    • Change the Target Architectures to ARM64
    • The final step is to add BUILD_OCULUS to the Scripting Define Symbols

    Now click “Play” in the editor, and you should see the text you set for Text Mesh Pro change from Nothing is Enabled! to Oculus is Enabled!

    Creating the build.cs script to call from CI/CD runner using Unity batchmode

    In the Unity project, under Assets, create a new folder called Editor. Right-click while in the folder and create a new C# script called Build.cs

    You can copy the contents of the attached build script below I’ve added regions and summary comments to each section to explain how this script works.

    using System;
    using System.Linq;
    using System.IO;
    using System.Text.RegularExpressions;
    using System.Threading;
    using System.Diagnostics;
    using UnityEngine;
    using UnityEngine.Rendering;
    using UnityEngine.XR.Management;
    using UnityEditor;
    using UnityEditor.XR.Management.Metadata;
    using UnityEditor.XR.Management;
    using UnityEditor.PackageManager;
    using UnityEditor.Build.Reporting;
    
    public static class Build
    {
        /// <summary>
        /// Allows us to get the Environmental Arguments passed in through the commandline.  
        /// </summary>
        private static readonly string[] Arguments = Environment.GetCommandLineArgs();
    
        /// <summary>
        /// Retrieves the value of a command-line argument by name, 
        /// searching for an argument starting with '--' followed by the 
        /// specified name and returning the following argument's value.
        /// </summary>
        private static string GetArgument(string name) =>
        Arguments[Array.IndexOf(Arguments, $"--{name}") + 1];
    
        /// <summary>
        /// We use this to retrieve the BuildDevice passed in from the pipeline variable or batcmode commandline.
        /// </summary>
        private static readonly BuildDevice BuildDevice = (BuildDevice)Enum.Parse(typeof(BuildDevice), GetArgument("deviceModel"), true);
    
    
        /// <summary>
        /// This section handles enabling all the project player settings, remove unused packages and directories, enabling 
        /// the device for XR Plug-in Managment, copying AndroidManifest files and setting the Scripting Define Symbols.
        /// Prepare is called from the Pipeline.Unity.csproj if there are no error the pipeline will continue onto the Invoke section
        /// of the build script. 
        /// </summary>
        /// <exception cref="ArgumentOutOfRangeException"></exception>
        /// <exception cref="Exception"></exception>
        public static void Prepare()
        {
            /// <summary>
            /// Used for holding the XR Management values and enabling the correct device when building the apk.
            /// </summary>
            string expectedLoader;
    
            /// <summary>
            /// Used for Unloading the uneccesary device packages not needed when building a specific device apk.
            /// </summary>
            string requiredPackageRegex;
    
            /// <summary>
            /// Used to define and remove device folder from the Project Assets folder
            /// </summary>
            string[] requiredDirectories;
    
            /// <summary>
            /// Used to hold all package names to compare against requiredPackageRegex
            /// </summary>
            var allPackageRegexes = new[] { "picoxr", "com.htc", "oculus" };
    
            /// <summary>
            /// Used to hold all Directories to compare against requiredDirectories
            /// </summary>
            var allDirectories = new[] { "Wave", "Oculus" };
    
            /// <summary>
            /// Switch is used to set and clean each pipeline project for the device that is being built.
            /// </summary>
            switch (BuildDevice)
            {
                case BuildDevice.Pico:
                    UnityEngine.Debug.Log("!Pico Neo enabled");
                    expectedLoader = "Unity.XR.PXR.PXR_Loader";
                    requiredPackageRegex = "picoxr";
                    requiredDirectories = Array.Empty<string>();
                    break;
    
                case BuildDevice.Vive:
                    UnityEngine.Debug.Log("!Vive Wave enabled");
                    expectedLoader = "Unity.XR.WaveXR.WaveXRLoader";
                    requiredPackageRegex = "com.htc";
                    requiredDirectories = new[] { "Wave" };
                    break;
    
                case BuildDevice.Oculus:
                    UnityEngine.Debug.Log("!Oculus Quest enabled");
                    expectedLoader = "Unity.XR.Oculus.OculusLoader";
                    requiredPackageRegex = "oculus";
                    requiredDirectories = new[] { "Oculus" };
                    break;
    
                default:
                    throw new ArgumentOutOfRangeException(nameof(BuildDevice), BuildDevice, "Unsupported build device.");
            }
    
            ///<summary>
            /// This section is used to remove unneeded directories in the Assets folder. It also reduces the
            /// the apps file size. 
            /// </summary>
            #region Remove Unused Directories
    
            var directoriesToExclude = allDirectories.Except(requiredDirectories);
            foreach (var directory in directoriesToExclude)
            {
                UnityEngine.Debug.Log($"!Directory removed {directory}");
                var error = AssetDatabase.MoveAsset(Path.Combine("Assets", directory), Path.Combine("Assets", $"{directory}~"));
            }
    
            #endregion
    
            ///<summary>
            /// This section is used to set the device under XR Plug-in Management you would find in project settings. 
            /// </summary>
            #region Set XR Plug-in Management
    
            if (!EditorBuildSettings.TryGetConfigObject(XRGeneralSettings.k_SettingsKey, out XRGeneralSettingsPerBuildTarget buildTargetSettings))
            {
                throw new Exception("Unable to retrieve configuration object of XR general settings.");
            }
    
            var settings = buildTargetSettings.SettingsForBuildTarget(BuildTargetGroup.Android);
            settings.InitManagerOnStart = true;
    
            foreach (var loader in settings.AssignedSettings.activeLoaders.ToList())
            {
                var loaderTypeName = loader.GetType().FullName;
                if (loader.name != expectedLoader
                    && !XRPackageMetadataStore.RemoveLoader(settings.Manager, loaderTypeName, BuildTargetGroup.Android))
                {
                    throw new Exception($"Unable to remove loader '{loaderTypeName}'.");
                }
            }
    
            if (!XRPackageMetadataStore.AssignLoader(settings.Manager, expectedLoader, BuildTargetGroup.Android))
            {
                throw new Exception($"Unable to assign loader '{expectedLoader}'.");
            }
    
            #endregion
    
            ///<summary>
            /// There is no need to keep the packages of other devices in a specific device build. 
            /// It bloats the project file size and will show null errors in the logcat console.
            /// We use this section to remove packages that are not needed.
            /// </summary>
            #region Remove Unused Packages
    
            if (requiredPackageRegex != null)
            {
                var listRequest = Client.List(true, false);
                while (!listRequest.IsCompleted)
                {
                    Thread.Sleep(100);
                }
    
                if (listRequest.Error != null)
                {
                    throw new Exception($"Failed retrieving packages: {listRequest.Error.errorCode} - {listRequest.Error.message}");
                }
    
                var regexes = allPackageRegexes.Where(regex => regex != requiredPackageRegex).ToArray();
                var packagesToRemove = listRequest.Result.Where(package => regexes.Any(regex => Regex.IsMatch(package.name, regex)));
                foreach (var package in packagesToRemove)
                {
                    var removalRequest = Client.Remove(package.name);
                    UnityEngine.Debug.Log($"!Packages removed {package.name}");
                    while (!removalRequest.IsCompleted)
                    {
                        Thread.Sleep(100);
                    }
    
                    if (removalRequest.Error != null)
                    {
                        throw new Exception($"Failed removing package '{package.name}': {removalRequest.Error.errorCode} - {removalRequest.Error.message}");
                    }
                }
            }
    
            #endregion
    
            ///<summary>
            /// Each device has a specific androidmanifest it generates on build or can be custom set. 
            /// In our case we are using the custom setting and copying the specific requirements to each 
            /// device build.
            /// </summary>
            #region Copy Device AndroidManifest
            File.Copy(
                Path.Combine(Application.dataPath, "Editor", $"AndroidManifest-{BuildDevice}.xml"),
                Path.Combine(Application.dataPath, "Plugins", "Android", $"AndroidManifest.xml"),
                true);
            #endregion
    
            ///<summary>
            /// Each device has different api and project settings that need to be enabled. Most of them are the same but
            /// in this section we can set the specific setting to enable the player setting features. 
            /// </summary>
            #region Set Device PlayerSettings
    
            switch (BuildDevice)
            {
                case BuildDevice.Pico:
                    PlayerSettings.SetGraphicsAPIs(BuildTarget.Android, new GraphicsDeviceType[] { GraphicsDeviceType.OpenGLES3 });
                    PlayerSettings.SetScriptingBackend(BuildTargetGroup.Android, ScriptingImplementation.IL2CPP);
                    PlayerSettings.Android.targetArchitectures = AndroidArchitecture.ARM64;
                    PlayerSettings.Android.minSdkVersion = AndroidSdkVersions.AndroidApiLevel29;
                    PlayerSettings.SplashScreen.show = false;
                    break;
                case BuildDevice.Vive:
                    PlayerSettings.SetGraphicsAPIs(BuildTarget.Android, new GraphicsDeviceType[] { GraphicsDeviceType.OpenGLES3 });
                    PlayerSettings.SetScriptingBackend(BuildTargetGroup.Android, ScriptingImplementation.IL2CPP);
                    PlayerSettings.Android.targetArchitectures = AndroidArchitecture.ARM64;
                    PlayerSettings.Android.minSdkVersion = AndroidSdkVersions.AndroidApiLevel26;
                    PlayerSettings.SplashScreen.show = false;
                    break;
                case BuildDevice.Oculus:
                    PlayerSettings.SetGraphicsAPIs(BuildTarget.Android, new GraphicsDeviceType[] { GraphicsDeviceType.OpenGLES3 });
                    PlayerSettings.SetScriptingBackend(BuildTargetGroup.Android, ScriptingImplementation.IL2CPP);
                    PlayerSettings.Android.targetArchitectures = AndroidArchitecture.ARM64;
                    PlayerSettings.Android.minSdkVersion = AndroidSdkVersions.AndroidApiLevel29;
                    PlayerSettings.SplashScreen.show = false;
                    break;
            }
    
            #endregion
    
            /// <summary>
            /// This passes in the BuildDevice and setting the scripting symbol to enable the defines code in each script
            /// </summary>
            #region Set DefineSymbols
            PlayerSettings.SetScriptingDefineSymbolsForGroup(BuildTargetGroup.Android, $"{PlayerSettings.GetScriptingDefineSymbolsForGroup(BuildTargetGroup.Android)};BUILD_{BuildDevice.ToString().ToUpperInvariant()}");
            #endregion
    
    
        }
    
        /// <summary>
        /// This section is called if Prepare doesn't have any errors and fails the build cycle. 
        /// It is used to programatically create a build of your project. Log the success or failure or the build and has a condition for
        /// Quest that quite the adb.exe task that hangs after a Succeeded build. 
        /// </summary>
        /// <exception cref="Exception"></exception>
        public static void Invoke()
        {
            UnityEngine.Debug.LogError($"!Buidling Invoke Started");
            var report = BuildPipeline.BuildPlayer(new BuildPlayerOptions()
            {
                scenes = new[] { "Assets/Scenes/SampleScene.unity" },
                locationPathName = $"{GetArgument("outputPath")}/{PlayerSettings.GetApplicationIdentifier(BuildTargetGroup.Android)}-ArborXR-Demo-{BuildDevice}.apk",
                targetGroup = BuildTargetGroup.Android,
                target = BuildTarget.Android,
                options = BuildOptions.CompressWithLz4HC | BuildOptions.StrictMode
            });
            
            ///<summary>
            /// Used to give more insight to the failure of a build
            /// </summary>
            foreach (var buildstep in report.steps)
            {
                foreach (var message in buildstep.messages)
                {
                    if (message.type == LogType.Error)
                    {
                        UnityEngine.Debug.LogError($"!Build Error {message.content}");
                    }
                    if (message.type == LogType.Exception)
                    {
                        UnityEngine.Debug.LogError($"!Build Exception {message.content}");
                    }
                    if (message.type == LogType.Assert)
                    {
                        UnityEngine.Debug.LogError($"!Build Assert {message.content}");
                    }
                }
            }
            switch (report.summary.result)
            {
                case BuildResult.Unknown:
                case BuildResult.Failed:              
                    UnityEngine.Debug.LogError($"{report.summary.result}");
                    break;
                case BuildResult.Cancelled:
                    throw new Exception($"Build result is '{report.summary.result}'.");
                case BuildResult.Succeeded:
                    if(BuildDevice == BuildDevice.Oculus)
                    TerminateAdbProcess();
                    UnityEngine.Debug.Log($"!Succeeded kill adb {report.summary.result}");
                    break;
            }
    
        }
    
        /// <summary>
        /// Kills the adb.exe for Quest since it hangs after the build has succeeded.
        /// </summary>
        private static void TerminateAdbProcess()
        {
            try
            {
                // Execute the taskkill command to terminate "adb.exe" directly
                Process.Start("taskkill", "/IM adb.exe /F");
            }
            catch (System.Exception ex)
            {
                UnityEngine.Debug.LogError("Error terminating adb process: " + ex.Message);
            }
        }
    }
    
    public enum BuildDevice { Pico, Vive, Oculus}

    Section 2 – Setting up GitLab

    Sign into GitLab and create a new blank project (repository)

    1. Login or create an account for Gitlab.com
    2. Under projects, create a project and select Create blank project

    Authorize GitLab on your local computer

    1. I assume you already have Git installed, but if not, download and install it.
    2. Now open the command terminal and check you have it installed by typing “Git version.”
    3. Go back to the repository you created and copy the “Clone with HTTPS” URL.
    4. Go to the root directory of your project and double-click on the ArborXR-Demo.sln. If you gave your project a different name, then click the <your-project-name>.sln
    5. Go to the Git menu and click Create a repository.
    6. Paste the Cloned URL and set the Unity root directory for the local repository path.
    7. You should be prompted with a GitLab sign-in screen. Proceed with your credentials.
    8. You might also be prompted to add your user name and email address to a global config file.

    Create a Unity .gitignore file

    Create a file called .gitignore, copy the contents below, save it and place it in the root of your Unity project directory

    ### Unity ###
    # This .gitignore file should be placed at the root of your Unity project directory
    #
    # Get latest from https://github.com/github/gitignore/blob/main/Unity.gitignore
    /[Ll]ibrary/
    /[Tt]emp/
    /[Oo]bj/
    /[Bb]uild/
    /[Bb]uilds/
    /[Ll]ogs/
    /[Uu]ser[Ss]ettings/
    
    # MemoryCaptures can get excessive in size.
    # They also could contain extremely sensitive data
    /[Mm]emoryCaptures/
    
    # Recordings can get excessive in size
    /[Rr]ecordings/
    
    # Uncomment this line if you wish to ignore the asset store tools plugin
    # /[Aa]ssets/AssetStoreTools*
    
    # Autogenerated Jetbrains Rider plugin
    /[Aa]ssets/Plugins/Editor/JetBrains*
    
    # Visual Studio cache directory
    .vs/
    
    # Gradle cache directory
    .gradle/
    
    # Autogenerated VS/MD/Consulo solution and project files
    ExportedObj/
    .consulo/
    *.csproj
    *.unityproj
    *.sln
    *.suo
    *.tmp
    *.user
    *.userprefs
    *.pidb
    *.booproj
    *.svd
    *.pdb
    *.mdb
    *.opendb
    *.VC.db
    
    # Unity3D generated meta files
    *.pidb.meta
    *.pdb.meta
    *.mdb.meta
    
    # Unity3D generated file on crash reports
    sysinfo.txt
    
    # Builds
    *.apk
    *.aab
    *.unitypackage
    *.app
    
    # Crashlytics generated file
    crashlytics-build.properties
    
    # Packed Addressables
    /[Aa]ssets/[Aa]ddressable[Aa]ssets[Dd]ata/*/*.bin*
    
    # Temporary auto-generated Android Assets
    /[Aa]ssets/[Ss]treamingAssets/aa.meta
    /[Aa]ssets/[Ss]treamingAssets/aa/*
    
    # Allowed files
    !PipelineBuild.Unity.csproj
    

    Now you should see a .gitignore file in the Git Changes tab in Visual Studio. Add the .gitignore file to staged changes, Commit Staged and Push the change.

    Setting up your GitLab Runner for Unity

    For more information on GitLab Runners, you can read the docs here or follow the listed steps below:

    1. Create a folder in your system at C:\GitLab-Runner.
    2. Download the binary for 64-bit or 32-bit and put it into the folder you created. The following assumes you have renamed the binary to gitlab-runner.exe (optional).
    3. Make sure to restrict the Write permissions on the GitLab Runner directory and executable. If you do not set these permissions, regular users can replace the executable with their own and run arbitrary code with elevated privileges.
    4. Click Start, type PowerShell, right-click Windows PowerShell, and then click Run as administrator.
    5. Change the directory to:
      cd C:\GitLab-Runner

    Before registering the runner, we need to set up a few things under GitLab settings -> CI/CD

    1. Go to Runner and click expand.
    2. Disable Shared runners since we will be using our own.
    3. Click “New project runner” to create a new runner.
    4. Select Windows and add “Unity” to tags.
    5. Set the Maximum job timeout and click “Create runner.”
    6. Back in the expanded Runner view, you should see a token. You will need this when registering your runner in the next section.
    7. Head back to the CI/CD page, expand Variables, and add Your Unity username and password.

    Now go back to the PowerShell window you opened earlier:

    1. Run the following command:
      .\gitlab-runner.exe register
    2. Enter your GitLab instance URL (also known as the gitlab-ci coordinator URL). It should look something like this https://gitlab.com/darrendelorme/arborxr-unity-gitlab
    3. Enter the token you obtained to register the runner.
    4. Enter a description for the runner. You can change this value later in the GitLab user interface.
    5. Enter the tags associated with the runner, separated by commas. You can change this value later in the GitLab user interface.
    6. Enter any optional maintenance note for the runner.
    7. Go back to the CI/CD section and check under Runners to see if your computer is listed and active under Assigned Project runners.

    You need to make an edit to the config.toml file found in the C:/Gitlab-Runner directory to looks like this:

    concurrent = 8
    check_interval = 0
    shutdown_timeout = 0
    
    [session_server]
      session_timeout = 1800
    
    [[runners]]
      name = "Unity_VR_Pipeline"
      url = "https://gitlab.com/"
      id = 15467934
      token = "your runner token will be here"
      token_obtained_at = 2022-06-03T23:11:59Z
      token_expires_at = 0001-01-01T00:00:00Z
      executor = "shell"
      shell = "pwsh"
      output_limit = 10000
      [runners.cache]
        MaxUploadedArchiveSize = 0
    

    The only additions you will need to make to the config.toml file is adding:

    concurrent = 8 (decrease concurrent builds if your machine resources are limited) 
    executor = "shell"
    shell = "pwsh"
    output_limit = 10000

    If you don’t change the output_limit the GitLab console log will exceed its limit. This does not help if your build fails and the errors can’t be seen. You will see this message:

    Job's log exceeded limit of 4194304 bytes.
    4813Job execution will continue but no more output will be collected.

    To change the build log size of your jobs in GitLab CI/CD, you can edit your config.toml file and add a new limit in kilobytes:

    [[runners]]
     output_limit = 10000

    Maximum build log size in kilobytes. The default is 4096 (4MB).

    Restart the GitLab runner for this to take effect.

    Setting up System Environment Variables

    In the next section we will be creating the pipeline file, which will call Unity.exe for batchmode. To keep from having to write a path to Unity.exe, we can add the path to the System Environment Variables.

    1. Locate Unity Installation Directory:
      Open File Explorer and navigate to the directory where Unity is installed on your computer. The default installation path is typically “C:\Program Files\Unity” or “C:\Program Files\Unity Hub”.

    2. Copy Unity Path:
      Inside the Unity installation directory, find the Editor folder, which contains the Unity executable (Unity.exe). Copy this path: C:\Program Files\Unity\Hub\Editor\2021.3.27f1\Editor

    3. Open System Properties:
      Right-click on the Windows Start icon and go to System.

    4. Access Advanced System Settings:
      In the System Properties window, click on the “Advanced system settings” option on the left-hand side. This will open the System Properties dialog box.

    5. Open Environment Variables:
      In the System Properties dialog box, click on the “Environment Variables” button near the bottom-right corner.

    6. Edit System Environment Variables:
      In the Environment Variables window, under the “System variables” section, scroll down and locate the Path variable. Select it and click the “Edit” button.

    7. Add Unity Path:
      In the Edit Environment Variable window, click the “New” button to add a new path entry.
      Paste the path to the directory where Unity.exe is located (the path you copied in step 2).
      Click “OK” to save the new path.

    8. Verify Changes:
      To verify that the path has been added correctly, open a Command Prompt (CMD) or PowerShell window and type unity –version. You should see Unity’s version information if the path was added successfully.

    9. Save and Close:
      Click “OK” to close the Environment Variables window.
      Click “Apply” or “OK” in the System Properties window to save the changes.

    10. Restart Applications:
      If you had any Command Prompt or PowerShell windows open, close and reopen them to ensure that they recognize the updated environment variable.

    Updating and Creating the .gitlab-ci.yml and PipelineBuild.Unity.csproj Files

    .gitlab-ci.yml

    Updating and Creating the .gitlab-ci.yml and PipelineBuild.Unity.csproj Files

    .gitlab-ci.yml
    Below, I’ve listed points to describe each area of the gitlab-ci.yml. The one area I want to bring to your attention is under .default script:

    - pushd "${Env:ProgramFiles(x86)}\Microsoft Visual Studio\Installer"
    - $msbuild = .\vswhere -version "[17.0, 18.0)" -latest -prerelease -requires Microsoft.Component.MSBuild -find MSBuild\**\Bin\MSBuild.exe | Select-Object -First 1
    - popd

    The first 3 lines above find and define msbuild to be used in the last line to call the PipelineBuild.Unity.csproj file we will create in the next section.

     - '& $msbuild -nologo -maxcpucount -verbosity:minimal -restore -target:"$Targets" PipelineBuild.Unity.csproj'

    Variables:

    • Variables allow you to define and manage data that can be used throughout your CI/CD pipeline.
    • These variables can be environment-specific or job-specific and can store information like paths, credentials, or custom settings.
    • The variables we have defined, such as Quest, Pico and Vive, get passed in as an environmental argument for each device build.
    • You will see these show up when you manually select run pipeline.

    Workflow: Rules:

    • The workflow section defines the structure and order of jobs in your CI/CD pipeline.
    • “Rules” within the workflow specify under which conditions each job should run.
    • Conditions can be based on branch names, tags, variables, or other factors, allowing you to control the pipeline’s flow.

    Stages:

    • Stages organize your CI/CD pipeline into logical phases or steps.
    • Each stage represents a distinct phase of the pipeline, such as “build,” “test,” or “deploy.”
    • Jobs are assigned to stages, and stages are executed sequentially.

    Default Settings:

    • Default settings refer to the global or project-level configuration that applies to the entire pipeline.
    • These settings include global environment variables, cache management, and shared configurations that all jobs can inherit.

    Build Settings:

    • Build settings pertain to the individual jobs or tasks within your CI/CD pipeline.
    • Each job can have its own specific configuration, such as the script to run, variables, artifacts to save, and dependencies.
    • Build settings allow you to customize the behavior of each job.

    Device-Specific Settings:

    • Device-specific settings, or environment-specific settings, allow you to tailor the pipeline’s behavior to specific conditions.
    • This could include variations in the pipeline based on factors like the target platform, operating system, or hardware.
    • Device-specific settings enable you to adapt your CI/CD process to different deployment environments or device configurations.
    variables:
      UNITY_VERSION: "2021.3.27f1"
      UNITY_CACHE_SERVER: "localhost:8126"
      Projects:
        value: 'DemoApp'
      DEMO_DEVICE_MODELS: 
        value: "Oculus;Pico;Vive"  
        description: 'Device models to build launcher for: Semicolon-separated list of "Pico", "Vive", "Oculus".'
    
    workflow:
      rules:
        # In merge request pipelines we don't want to run build jobs.
        - if: $CI_MERGE_REQUEST_IID
          variables:
            Projects: ''
        # Apps can be deployed manually from the `main` branch, as long as the version was changed.
        - if: $CI_PIPELINE_SOURCE == "web" && $CI_COMMIT_BRANCH == 'main'
          variables:
            Deploy: 'true'
        # Manual builds don't get deployed and are for QA. The `main` branch is for deployments only.
        - if: $CI_PIPELINE_SOURCE == "web" && $CI_COMMIT_BRANCH != 'main'
          variables:
            Deploy: 'false'
            IsForQA: 'true'
    
    stages:
      - build
    
    .default:
      image: unityci/editor:$UNITY_VERSION
      stage: build
      script:
        - pushd "${Env:ProgramFiles(x86)}\Microsoft Visual Studio\Installer"
        - $msbuild = .\vswhere -version "[17.0, 18.0)" -latest -prerelease -requires Microsoft.Component.MSBuild -find MSBuild\**\Bin\MSBuild.exe | Select-Object -First 1
        - popd
        - '& $msbuild -nologo -maxcpucount -verbosity:minimal -restore -target:"$Targets" PipelineBuild.Unity.csproj'
      interruptible: true
      variables:
        GIT_STRATEGY: fetch
        GIT_CLEAN_FLAGS: -ffdx -e arborxr-demo/Library
        IsRunningInAutomation: 'true'
        PROJECT: "Demo"
        VERSION_DIR_NAME: "ArborXR-Demo"
    
    .build:
      extends: .default
      stage: build
      variables:
        Targets: $Project
      artifacts:
        expire_in: 1 month
        paths:
          - build 
    
    .build launcher:
      extends: .build
      variables:
        Project: DemoApp
        VersionDirName: ArborXR-Demo
    
    build demo [Pico]:
      extends: .build launcher
      rules:
        - if: $DEMO_DEVICE_MODELS =~ /\bPico\b/
      variables:
        DEVICE_MODEL: "Pico"  # Override the default device model
    
    build demo [Vive]:
      extends: .build launcher
      rules:
        - if: $DEMO_DEVICE_MODELS =~ /\bVive\b/
      variables:
        DEVICE_MODEL: "Vive"  # Override the default device model
    
    build demo [Oculus]:
      extends: .build launcher
      rules:
        - if: $DEMO_DEVICE_MODELS =~ /\bOculus\b/
      variables:
        DEVICE_MODEL: "Oculus"  # Override the default device model

    PipelineBuild.Unity.csproj

    PipelineBuild.Unity.csproj
    Another area I want to bring to your attention is the batchmode command. We define the unity command with UnityCommandPrefix and pass in arguments to the build.cs script in Unity like the –deviceModel.

    -logfile – with no defined output path, will log to the web console so you can see a live view of the build.

    With a few edits, you could use this batchmode command in Powershell to run a Unity build normally without the GitLab runner.

    <UnityCommandPrefix>Unity.exe -batchmode -quit -disable-assembly-updater -buildTarget Android -projectPath . -logFile - --outputPath $(MSBuildProjectDirectory)/$(OutputDirectory) --deviceModel $(DEVICE_MODEL) -executeMethod</UnityCommandPrefix>

    Next, we execute the batchmode command and tell it to executeMethod Build.Prepare. We have set LogstandardErrorAsError to true to catch any error, but tell it to ContinueOnError with a warning so the pipeline build does not fail.

     <Exec LogStandardErrorAsError="true" Command="$(UnityCommandPrefix) Build.Prepare" IgnoreStandardErrorWarningFormat="true" ContinueOnError="WarnAndContinue"  />

    Once the Build.Prepare section has completed configuring the project for the specific device the pipeline proceeds to call the Build.Invoke to build the apk.

    <Exec LogStandardErrorAsError="true" Command="$(UnityCommandPrefix) Build.Invoke" IgnoreStandardErrorWarningFormat="true" ContinueOnError="WarnAndContinue"/>

    <Project>:

    • This is the root element of the MSBuild project file.
    • It defines the entire build process and contains various targets, tasks, and item groups.

    <Target>:

    • Represents a specific build step or task within the build process.
    • Each target can have a name and dependencies on other targets.
    • Targets are executed sequentially based on their dependencies.

    <ItemGroup>:

    • Groups a collection of items together.
    • Items can be files, directories, or other build-related objects.
    • In this context, it is used to specify groups of files or device models.

    <None>:

    • Specifies files that should be included in the project but not compiled or processed.
    • In this case, it lists XML and script files to be included in the project.

    <PropertyGroup>:

    • Defines a set of properties and their values.
    • Properties are used to store values or settings that can be referenced elsewhere in the project file.

    <OutputDirectory>:

    • A property that sets the output directory for build artifacts.
    • The value specifies where the build output will be stored.

    <DeviceModel>:

    • Represents a device model.
    • Multiple device models can be defined within an <ItemGroup>.
    • This is often used for specifying different build configurations.

    <MakeDir>:

    • A task that creates a directory if it doesn’t exist.
    • In this case, it ensures that the specified output directory is created.

    <UnityCommandPrefix>:

    • A property that defines a prefix for the Unity command to be executed.
    • It includes various options and arguments for Unity batch mode.

    <Error>:

    • A task that generates an error message if a condition is met.
    • Used to validate conditions and report errors during the build process.

    <Exec>:

    • A task that executes a command or script.
    • It can capture the standard output and standard error streams and control error handling.

    <_PublishedUnityOutput>:

    • An item group that includes the path to a published Unity output file.
    • Used to track and validate the generated build output.
    <Project>
      <Target Name="DemoApp" DependsOnTargets="PrepareUnityProject;BuildDemo;BuildUnityProject" />
      <!-- Files -->
      <ItemGroup>
        <None Include="Assets/Editor/AndroidManifest*.xml" />
        <None Include="Assets/Editor/Build.cs" />
      </ItemGroup>
      <PropertyGroup>
            <OutputDirectory>Build/</OutputDirectory>
      </PropertyGroup>
    
    
      <ItemGroup>
        <!-- Define your device models here as ItemGroup -->
        <DeviceModel Include="Pico" />
        <DeviceModel Include="Vive" />
        <DeviceModel Include="Oculus" />
      </ItemGroup>
    
      <Target Name="PrepareUnityProject">
        <MakeDir Directories="$(OutputDirectory)"/>
        <ItemGroup>
          <_AndroidDeviceModel Condition="'$(DEVICE_MODEL)' == ''" Include="Pico;Vive;Oculus" />
          <_AndroidDeviceModel Condition="'$(DEVICE_MODEL)' != ''" Include="$(DEVICE_MODEL)" />
    
        </ItemGroup>
    
        <PropertyGroup>
          <AppName>DemoApp</AppName>
    
          <!-- TODO: Remove this once we can create multiple launcher builds in parallel. -->
          <BuildInParallel>false</BuildInParallel>
        </PropertyGroup>
      </Target>
      
    
      <!-- This is a custom target named "PublishDemo" -->
      <Target Name="BuildDemo" DependsOnTargets="PrepareUnityProject">
       
        <Error
          Condition="'$(DEVICE_MODEL)' != 'Pico' And '$(DEVICE_MODEL)' != 'Vive' And '$(DEVICE_MODEL)' != 'Oculus'"
          Text="The property 'DEVICE_MODEL' is set to '$(DEVICE_MODEL)' which is not one of the allowed values (Pico, Vive, Oculus)." />
    
    
        <PropertyGroup>
          <UnityCommandPrefix>Unity.exe -batchmode -quit -disable-assembly-updater -buildTarget Android -projectPath . -logFile - --outputPath $(MSBuildProjectDirectory)/$(OutputDirectory) --deviceModel $(DEVICE_MODEL) -executeMethod</UnityCommandPrefix>
        </PropertyGroup>
        <Exec LogStandardErrorAsError="true" Command="$(UnityCommandPrefix) Build.Prepare" IgnoreStandardErrorWarningFormat="true" ContinueOnError="WarnAndContinue"  />
        <ItemGroup>
          <_PublishedUnityOutput Include="$(MSBuildProjectDirectory)/$(OutputDirectory)/$(DEVICE_MODEL).apk" />
        </ItemGroup>
        <Error Condition="'@(_PublishedUnityOutput)' == ''" Text="No published output found. See the previous build warnings/errors for details from Unity." />
      </Target>
    
      <Target Name="BuildUnityProject" DependsOnTargets="BuildDemo">
        <!-- TODO: Remove `ContinueOnError` and the following `_PublishedUnityOutput` definition and handling once Unity no
        longer gives errors while producing a working apk. -->
        <!-- Since Unity spits out a bunch of warnings and errors we just warn about them here instead of failing the
        target... -->
        <Exec LogStandardErrorAsError="true" Command="$(UnityCommandPrefix) Build.Invoke" IgnoreStandardErrorWarningFormat="true" ContinueOnError="WarnAndContinue"/>
        <!-- ...then we ensure we got a published file, otherwise we really want to fail the target. -->
        <ItemGroup>
          <_PublishedUnityOutput Include="$(MSBuildProjectDirectory)/$(OutputDirectory)/$(DEVICE_MODEL).apk" />
        </ItemGroup>
        <Error Condition="'@(_PublishedUnityOutput)' == ''" Text="No published output found. See the previous build warnings/errors for details from Unity." />
      </Target>
     
    </Project>
    

    Running your First Pipeline Build

    This is it. If you made it this far, congratulations! Don’t forget to push your changes when creating and adding the .gitlab-ci.yml and PipelineBuild.Unity.csproj and other files we created in this explanation.

    1. Go back to GitLab under the repo you pushed the changes to and select Pipeline from the navigation panel.
    2. Click on Run pipeline.


    3. Select the branch you want to run the pipeline from and click “Run pipeline”
    4. You should be redirected to the page where the builds are showing their status. If they are successful you will see a green check beside each build.
    5. While they are running, if you click on one of the build demos, you can see the log output in the web console. This is useful for reading any error that might occur.
    6. You can access the apk builds from Job artifacts by either downloading the zipped folder, browsing the apk in the web portal or finding it under the GitLab-Runner/builds folder in the local directory of the pipeline machine you set up.

    Common Pipeline Errors

    Problem: Aborting batchmode due to fatal error

    Common Pipeline Errors

    Problem: Aborting batchmode due to fatal error
    Aborting batchmode due to fatal error: 1866 Shader compiler initialization error: Failed to get ipc connection from UnityShaderCompiler.exe shader compiler! C:/Program Files/Unity/Hub/Editor/2021.3.27f1/Editor/Data/Tools/UnityShaderCompiler.exe

    Solution:

    1. Open Regedit
    2. Go to “HKLM\SYSTEM\CurrentControlSet\Control\Session Manager\SubSystems”
    3. Double-click “Windows”
    4. Change the 768 number in the “SharedSection=1024,20480,768” part to 2048 or 4096 depending on how much ram your computer has.
    5. Restart Windows.

    Problem: Gradle Daemon

    Problem: Gradle Daemon
    Gradle Daemon, 1 busy and 1 incompatible and 5 stopped Daemons could not be resued, use –status for details

    Solution:

    1. Start->Services->right click gitlab-runner->Properties->Log On->This user-> setup your local administrator account user
    2. Restart gitlab-runner service (from this panel is ok)
    3. Try building again.

    Problem: Build gets stuck

    Problem: Build gets stuck
    Build gets stuck on “Exiting batchmode successfully now! The issue is that Unity does not close the adb.exe task it started when building the apk.

    Oculus will run a second adb.exe process during the build. From what I can tell, the need to start the adb.exe for Oculus is only required in Editor when accessing the Unity->Oculus menu to create local builds. I also see a call to start the adb.exe when looking for attached USB devices for the system profile panel. Further reading of the OVRSystemProfilerPanel.cs states the tool is deprecated.

    Unless you plan on using the Oculus menu to generate your local build, which is redundant against the normal Unity Build window, this script is not really needed.

    Solution:
    The Oculus integration SDK, found in the Assets folder under Oculus, has a script under VR -> Editor->OVRADBTool.cs.

    I found the simplest workaround for this problem is to comment out the adbPath property on line 56 under OVRADBTool.cs

    The result speeds up the Oculus build, keeps the invoke command from failing and exits batchmode adb.exe without hanging.

    Summary

    In this comprehensive guide, we’ve taken you through the crucial steps to set up a Multi-platform Unity project seamlessly. From choosing the right Unity version to creating a GitLab repository, configuring your system environment variables, and running your initial pipeline build, we’ve covered it all. We even provided solutions to common pipeline errors along the way. However, remember that the world of Unity development is vast, and there’s so much more to explore beyond the basics. While we’ve kept this article focused, we’re eager to delve into more advanced topics like cloud storage integration, notification systems, apk signing, and creating QA/Production build workflows in a potential follow-up Part 2.

    In our next ArborXR Home blog, we will cover the setup and creation of a Multi-Platform XR Input System. Building on top of the work we just completed in this article.

    Darren Delorme
    Darren Delorme

    Unity XR Developer @ ArborXR

    Interested in getting started?

    Experience AR & VR device management made easy. Start using ArborXR free today. If you have any questions, visit our product page or email us at hello@arborxr.com.

    Subscribe to stay in the know!


    Viewing all articles
    Browse latest Browse all 117

    Trending Articles